Friday, 26 April 2013

Summery Smoked Mackerel Pate

Spring finally seems to have made it's way to England, and the weather is starting to hint at picnics, bike rides, BBQs and dresses. It might not be quite there yet, but it's definitely got me in the mood to start eating like it's the summer. We've eaten lunch outside a couple of days, still firmly wrapped up in jumpers, and it's so lovely to feel a bit of sunshine! 

This delicious pate always makes me feel summery, even if you eat it in the middle of December. It's a doddle to make, and makes for a scrummy and easy lunch. The fresh creamy, lemony flavour means that it'll be sunny for your tastebuds, even if it's gloomy outside! 

Start by breaking up the mackerel into a bowl and removing the skin and any bones, then add in all the other ingredients.

And mash up with a fork until it's a gorgeous smush

Ingredients
250g smoked mackerel fillets
1 tbsp mayonnaise
1 tbsp plain yoghurt
1 tbsp double cream/single cream/creme fraiche
2 tsp lemon juice (fresh ideally, or from a bottle is OK too)
Black pepper to taste

1. Use your hands to remove the skin from the mackerel fillets. Break flesh into a bowl, feeling for and removing any remaining bones.
2. Add all the other ingredients and mix together with a fork, breaking down the fish. If you wanted, you could blend all or half of the mixture at this point for a much smoother pate. I prefer it left chunky though. Adjust flavourings to taste.
3. Enjoy, spread on wholemeal bagels/bread/biscuits, with sliced cucumber.

A perfect spring lunch! 

And there was enough leftovers for a bento lunch the next day!

Friday, 19 April 2013

Date and Orange Flapjack Slice

Today was a day for baking and cooking and spending all morning in the kitchen. I made a Japanese (ish) bento for the first time in ages, with a whole selection of my favourite things, but when I posted my photos on instagram, it was the photo of the date and orange flapjack slice I made that got all the likes.


Perhaps I shouldn't be surprised. After all, the recipe did come from my Mum and she is known for her delicious, crowd pleasing cakes. There are so many cakes that she makes regularly and all of them are delicious; smartie cookies, brownies, date loaf, caramel shortbread, mars bar cake, hot cross buns, chocolate biscuit cake, dark ginger cake, ginger shortbread, apple scone...is your mouth watering yet? Whilst none of the recipes are of her own devising, she has a hoarders instinct for finding fantastic recipes from here there and everywhere! When my friends and I were at University, she did a fantastic job of posting cakes round to everyone when budgets were low and exam stress high. While I tell myself my friends visit my house to see me, the amount of time we always seem to spend in the kitchen suggests that Mum's cake tins are a definite draw too!

Despite all these delicious offerings, I've only ever posted one, chocolate brownies, which is probably the most generic of all her recipes! It is really yummy though, so give it a go if you want something super easy. After I'd posted the photo of my flapjack, 2 of my friends asked for the recipe, so I thought I'd share it on here. I might even share some more of her recipes too...of the list above, which one tickles your tastebuds the most?!

So anyway, today I'm going to share the orange flapjack recipe to please Stacey and Alaina! The end result is sweet and gooey, not nearly as dry as a usual flapjack, but because of all those oats you can still kid yourself it's vaguely healthy! I'm normally a flapjack hater, but I love it, and my boyfriend is normally a citrus hater, but he loves it. Basically, its yummy. Make it, eat it.


Date and Orange Flapjack Slice Recipe

4oz (100g) self raising flour
6oz (150g) porridge oats
6oz (150g) soft brown sugar (today I used half muscavado and half white castor)
6oz (150g) marg (if you use a dairy free marg, the whole recipe is vegan. I used Pure Soya)
1 large orange, rind and juice (separately)
8oz (200g) roughly chopped dates
Pinch bicarb of soda (baking soda)

Preheat oven to gas mark 5/190C/375F and line a 6"x8" (roughly) tin with non stick paper.
Put dates, orange juice and bicarb in a small saucepan. Add a large splash of water, so the dates are mostly covered. Heat over a low heat, stirring frequently, until the dates disintergrate and it turns into a delicious sticky mess. Put to one side to cool slightly.
Melt the marg, then stir in flour, oats, sugar and orange rind.
Put half the oat mixture into the tin and press down. It needs some help to get it to cover the whole bottom, but a lot of squishing will get it there.
Spread all of the date mixture over the top.
Cover with the rest of the oat mixture. This is a bit stressful, as the dates are too soft and the flapjack is too hard! Mum's top tip is to basically slice the flapjack mixture up and put it on top of the dates sliced up, so you don't have to spread it. My take is just to grab bits, use my fingers to smoosh them flat and dump them on the top. Either way works!
Put in the preheated oven for 20 minutes. Take out and leave to cool in the tin.

All boxed up and ready to send to this month's foodie penpal! 


Sunday, 7 April 2013

Snow Business: Snowman Onigiri and Polar Bear Cupcakes

This post is one I wrote a while ago too, back when it first snowed. Since its April, you'd think it'd be way behind the times, but we went for a walk along the canals this week and there's still snow around. Will it ever be spring?!

I hate snow. A winter spent in northern Japan will do that to you. Add to that the fact that I was travelling all over the country while the snowstorms were going on last week, and you have the recipe for a rather grumpy girl! Luckily, the leader of the Brownie pack I help with came up with a solution...the Snow Challenge badge! For those of you who don't do Guiding, challenge badges are exactly what they sound like; you do a selection of challenges and then you get a badge! 

This Snow Challenge involved doing some outdoor activities in the snow, but also choosing some indoor ones to do too. Unsurprisingly, I chose the food challenges! The two for this badge were making a wintery meal, and decorating some cupcakes or biscuits with a winter theme. So, I cheered myself with having a baking and decorating session!

To start with, snowmen onigiri. Rice balls, filled with chicken mayo, decorated with nori, carrot, mangetout and ham. These were so fun to make, and really easy (although a circle punch would have made them less fiddly!)

This one got a hat too!

I also decorated some polar bear cupcakes! The recipe and idea came out of a magazine John's Mum gave me for Christmas, and as soon as I saw how cute they were I just had to make them! Other than the marshmallows as decoration, the recipe is entirely vegan. I nearly had a panic attack when I realised I was halfway through making a cake with no EGGS but I succeeded! My friend, Stacey, helped me and we decorated a whole family!  They were really fun to make, quite easy, and tasted DELICIOUS! 

Mummy and Daddy bear in muffin cases, and a baby made in a normal cake case. 


Recipe for Polar Bear Cupcakes
Ingredients
200g plain flour
75g dessicated coconut
100g caster sugar
30g almonds (I used ground almonds when I made it, but my mum used mixed chopped nuts. Both worked)
1 1/2 tsp baking powder
1/2 tsp bicarb. of soda
190ml coconut milk
4tbsp sunflower oil
1 tsp vanilla extract
To decorate
White marshmallows, both normal and mini ones
Dark chocolate/black writing icing/edible pen
200g icing sugar
2 tbsp lemon juice
1 tsp hot water
150g dessicated coconut

Method
Preheat oven to 200C/Gas Mark 6
Whisk together coconut milk, oil and vanilla. Mix in flour, coconut, sugar, almonds, baking powder and bicarb. 
Spoon into cupcake cases. As shown above, you can make large or small ones, depending on your preference. 
Bake for 12-15 minutes, until risen and golden. Remove from oven and leave to cool.
Cut the large marshmallows in half, and draw paw prints and muzzles on them (4 paws for each muzzle). Pipe dots on the small ones for eyes and ears. 
Mix icing sugar with lemon juice and hot water to make the icing. Put the dessicated coconut on a plate. Once the cakes are cool, cover with the lemon juice and roll the cake in the coconut until covered. Use the rest of the icing to stick the marshmallows to the polar bear. 

 
Death by knife!

If you want the cake but not the fuss, it still tastes yummy as a plain, big cake too! 

Great British Bake Off Challenge: Chocolate Roulade

I made this a while ago, and the photos have been patiently waiting until I could be bothered to type it up! 

When my whole family got together just after Christmas (I told you this was old!), Mum knew I would happily make the dessert. A quick look down the list of Great British Bake Off technical challenges, and one definitely popped out at me...a decadent chocolate roulade. Now way back when I was doing my GCSEs, in Food Tech, we had to design a cake. I made lemon swiss roll with a variety of flavourings. I spent weeks trying out different flavourings, sizes, toppings and ingredients, and so I like to think of myself as a bit of a dab hand at rolled up cake! Whether its because of this past practise, or just because this cake was really easy, this came together beautifully, and left the whole family in a state of chocolately bliss! 

Ingredients:
6oz good quality dark chocolate
6 free range eggs
6oz castor sugar
2 tbsp cocoa powder
300ml double cream (this is how much Mary Berry's recipe asked for, but we used a lot less, maybe only 180ml or so)
Icing sugar, to dust

Method, with photos:
Preheat the oven to 180C/160C fan/Gas mark 4.
Line a 13x9 inch tin with greaseproof paper.

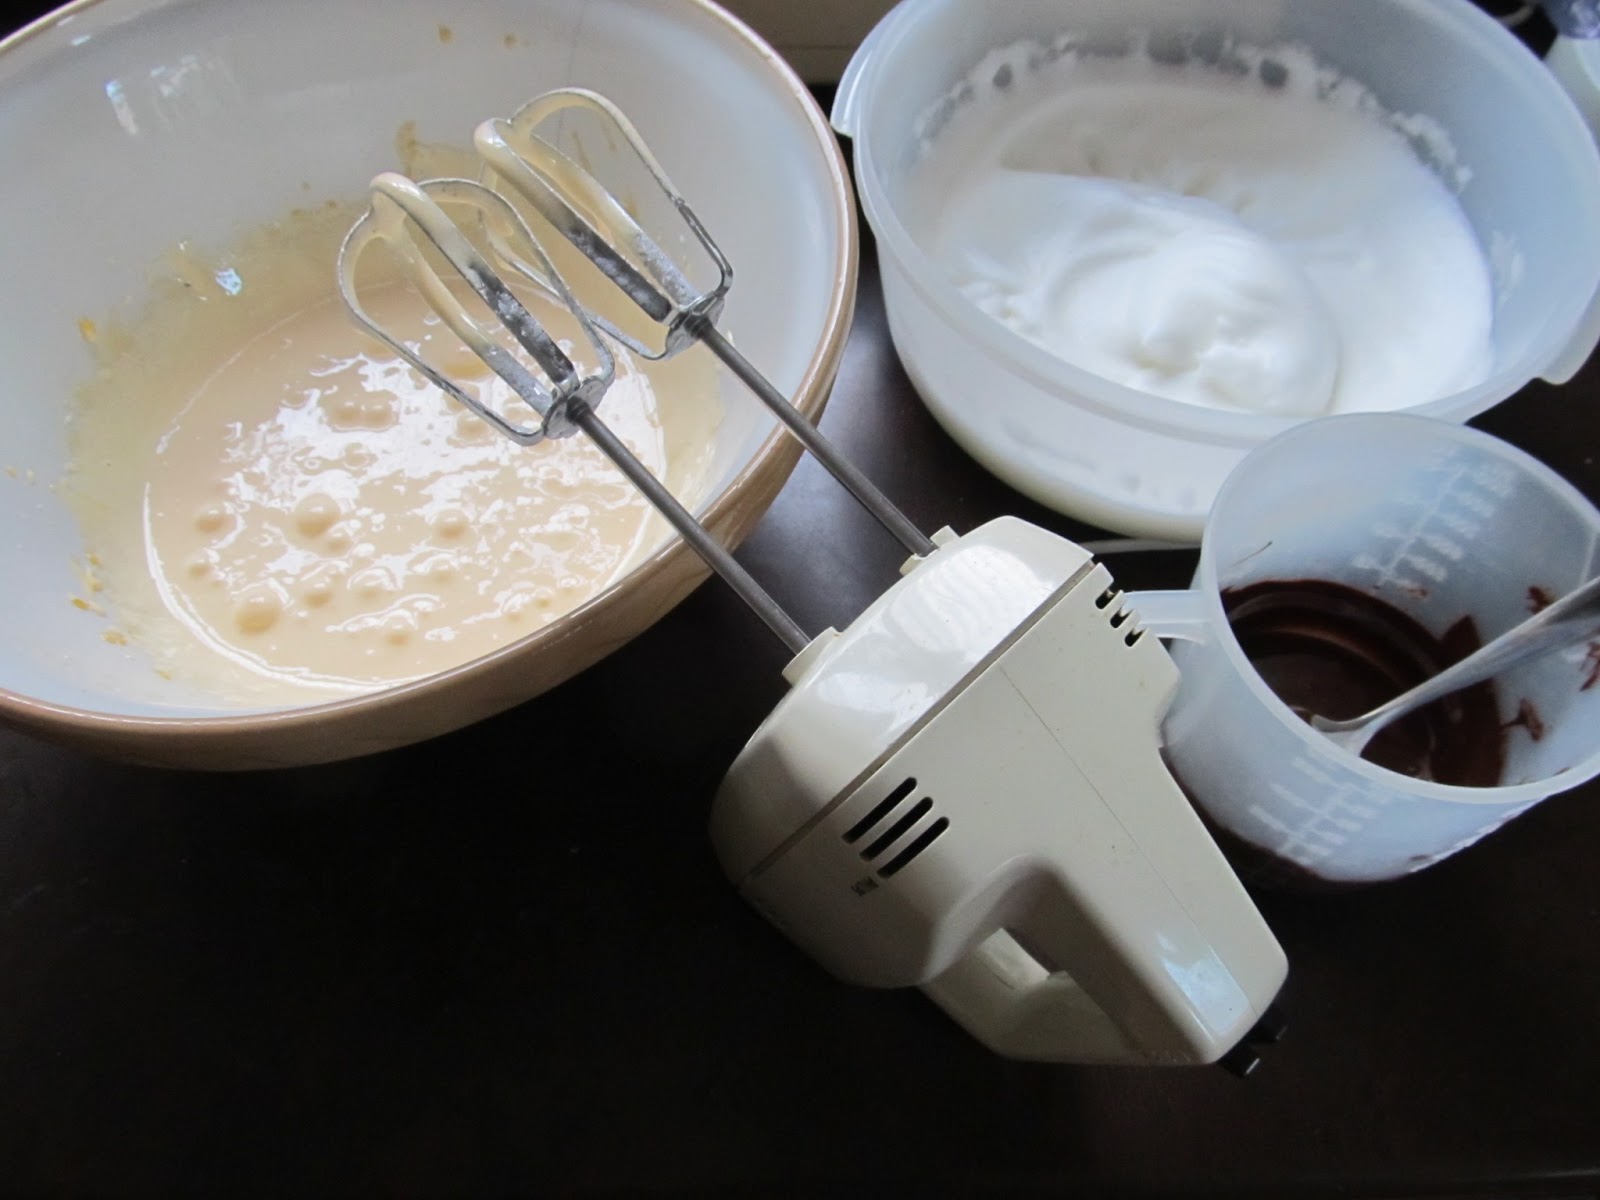
You start by melting the chocolate, then separate the eggs, with all 6 yolks in one large bowl, and all six whites in another. Whisk the egg whites until stiff (not dry, you should be able to hold them upside down without it falling out). Add the sugar to the egg yolks and whist until the mixture leaves a ribbony trail when the whisk is lifted.

Stir the melted chocolate into the egg yolks. 

Fold the egg whites into the egg/chocolate mixture. Do 2 tbsp first to loosen the mixture, then add the rest and fold in gently. Try to keep as much air in as possible. Sift in cocoa powder and gently mix in. 

Pour into a tin, and level by tilting the tin and gently encouraging with a spoon. Try not to squash out more air than you can help. Bake for 20-25 mins until risen and the top feels firm and slightly crisp. 

 
Once its out, leave it to cool completely in the tin. While its cooling, whip your cream. If you have a crazy father like mine who is convinced he can't eat cream, make some buttercream for his section. That does make it horrendously sickly, but my Dad has the sweetest tooth known to man! 

Once the roulade is cooked, get a large bit of greaseproof paper, sprinkle it with icing sugar and turn the roulade onto it, with a long edge nearest you. Peel off the paper that it was cooked with. Spread it with the cream, leaving a border along each long edge. Make a cut, about 1cm in from the edge, along the edge closest to you, halfway down through the sponge. Starting from this edge, roll it up. Be quite firm, and use the paper to help if you want. It doesn't matter if it cracks. 

Put it onto a serving dish and serve! It was DELICIOUS. It doesn't need anything with it, and you'll feel sick after even a small piece, but it'll be in that very satisfied, I still want to eat more kind of way. 

Next time you have a need for a fancy pudding, make this. You won't regret it! Just make sure there aren't too many people coming over. You'll definitely want leftovers. 

Original recipe is here, on  the Great British Bake Off section of BBC food

February and March food round-up

It's been a while since I've done much blogging. I've been moving, settling into Birmingham, finding a job, and just generally been feeling rather uninspired recently. But everything is pretty much on track now. John has a job, I have a job (hopefully), we're moving into a lovely new flat next month, we're meeting people, getting involved with things again, etc. It's lovely. And since I won a prize (of a month's supply of Able and Cole vegetable boxes - more of that in a future post, I'm sure) through Bits and Bobs Becs and Fay's Food Fables Meat Free March, I've been reinspired to take up blogging properly again. It might last, it might not, but lets see how it goes!! 

For this first post back, I'm going to do a quick round-up of some of the favourite thing I've made in the last couple of months. As you can see, I've been baking a lot! I've done more actual yummy cooking too, but I'll save that for some more detailed blog posts later! 

Valentines Day cupcakes for my Dad

Sweet sushi

I haven't stopped bento-ing, but I haven't had much call for it recently. This was one snack bento I made for me and my parents to share on a walk. 

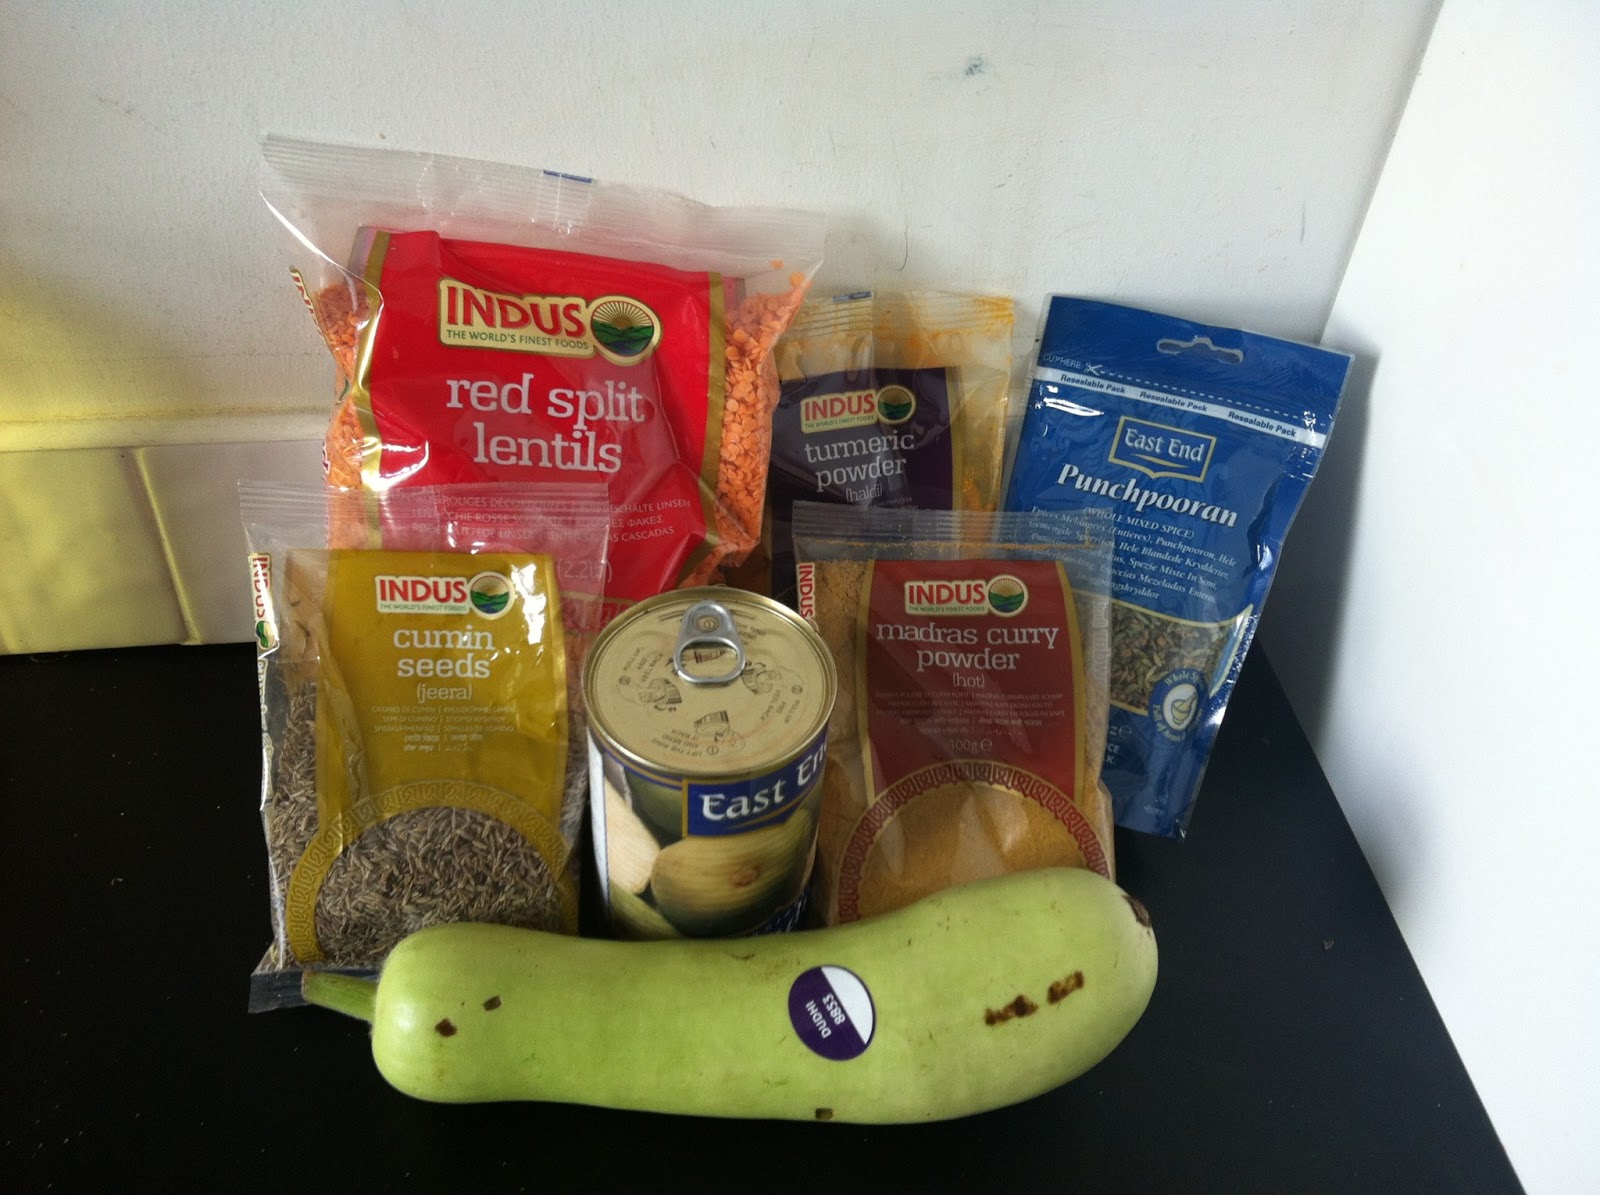
Definitely the best things about Birmingham is the amazing collection of world foods available everywhere. We've been experimenting with food for all over the globe! This was for an Indian feast! 


Caribbean Pineapple beans with fried plantain and brown rice


Biscuit tree tower! So much fun to make! I used Mary Berry's Easter biscuit recipe, which was easy and delish!

Decorating hot cross buns for Easter! These ones had swirls to separate them from the other batch, since I don't like candied peel in mine! 

Wednesday, 27 March 2013

Meat Free March Recipe Swap: Vegan Cheesecake

I've given up meat for lent this year, just as I did 2 years ago. I love cooking veggie food anyway, and it's such a fun way to make yourself try out different meals. I find that when I'm veggie, rather than choosing a meat and planning my meal around that I think a bit more outside the box. Whether I start by choosing a cuisine, a carb, a protein or a veggie, I find it makes things much more varied and I end up with lots of yummy meals! It's also healthier, cheaper and better for the environment. What's not to love?! 

When I saw that Becs over at Bits and Bobs Becs and Fay at http://www.foodfables.co.uk/ were doing 'Meat Free March', and had a recipe swap to go along with it, I knew I had to get involved! The idea was that everyone got partnered up and sent a meat free recipe along with a couple of ingredients. I was partnered with vegan Sharon, who is supposed to be starting up a blog at www.virtuallyvegan.co.uk but hasn't quite got it going yet! 

When my parcel from Sharon arrived yesterday, along with a recipe for coconut and lime vegan cheesecake, I could have hugged her, for several reasons! 
a) I was supposed to be having a friend over for a dairy free dinner that evening and had no inspiration for a pud at all.
b) Her dessert included both silken tofu and avocado, both of which I have been meaning to try out in a dessert for ages and have never been brave enough to try. 
c) It involved a buttery biscuit base, and any excuse to watch this video is OK with me!  

Sharon's parcel included the silken tofu and some creamed coconut, in a lovely box

I sprinted off to the shop, and bought all the other bits and bobs I needed. (Ingredients list and recipe are at the bottom of the post), and proceeded to get started. 

All ready to get started. Doesn't that lovely interesting selection of ingredients just make you want to dive in? 


First step (melt chocolate and marg and mix into biscuit crumbs and coconut) was successfully accomplished, and as per instructions, I pushed it down in a dish. Unfortunately, this is where I had a slight wobble! Sharon said on her instructions that she's quite an instinctive cook, and the amounts were very vague. Given this, I have no idea why, when I knew the mixture was too dry and wouldn't set together properly, I didn't mix in more butter and chocolate. A combination of laziness and stupidity, clearly. After the 1 hour setting time, my mixture still looked like this when you prodded it: 

Clearly never in a million years going to set.
I then had a rethink. It wasn't going to set, and I didn't have time to melt more chocolate and try again. After a lot of flapping round the kitchen, I decided that individual glasses what what I needed. Unfortunately, I have just moved house, have very minimal kitchen equipment at the moment and so had nothing of the kind in the house, apart from one slightly dodgy wine glass. A lot more flapping later, I found a stack of hummus tubs we'd finished with stacked in the recycling. After a wash, they made very respectable dishes. Hurrah for re-purposing! 

Problem resolved, I mixed together the topping ingredients.


And spread it on to the biscuit base, with a bit of dessicated coconut and lime to decorate, and ta-dah! finished! 


Hummus tubs...
...or dodgy wine glass? 
I'm really pleased with how these turned out, both in appearance and taste. Individually, I was worried the base was too coconutty and the topping was too limey, but together they formed a delicious and harmonious whole. There was more based compared to topping than I'd expect for a cheesecake (mine was about 50/50), but when eating I actually thought that was OK. The texture of the tofu mixture was really surprisingly cheesecake like, and has to be healthier than munching normal cheesecake! And best of all, it was so easy! My boyfriend wasn't a fan of the lime (he's weird with citrus desserts), but has begged me to make a berry version soon, and my friend and I both wolfed ours down. Definitely don't be put off by the unusual ingredients, this makes for a scrummy pud! 


Vegan Lime and Coconut Cheesecake
For the base
6-8 squares of dark chocolate
3 tbsp dairy-free marg
1 packet of biscuits, crushed to crumbs (Sharon suggested ginger nuts, but I used plain old digestives)
100g dessicated coconut
For the topping 
1 packet (300g) of silken tofu
1 avocado
100g creamed coconut
3 limes, zest and juice (this was quite strong, maybe less if you want a subtler flavour)
70g castor sugar

1. Melt chocolate and marg together. Mix in coconut and biscuit crumbs. Press into bottom of a greased dish (1 big 9 inch flan tin or several individual dishes). Leave to set for an hour. 
2. Heat creamed coconut with lime zest and juice. Put into bowl with rest of topping ingredients and blend until smooth. 
3. Add to the top of the base(s) and decorate with dessicated coconut and sliced lime rind (or something else, Sharon suggested kiwi but I'm not a big fan)
4. Leave to set for about 3 hours, then grab a spoon and dig in! 


Thank you very much to Becs and Fay for the organising, and Sharon for sending me such an interesting, delicious recipe! 


Sunday, 3 March 2013

February Foodie Penpals

This was my second month taking part in the fantastic Foodie Penpals, organised by Carol Anne over at thisisrocksalt.com. Any scheme that means I get a lovely parcel of food delivered through the post is a fab one by my reckoning!

This month I sent my parcel to London based Italian Lucia over at www.lulabellaskitchen.com, a fantastic blog with loads of ways to make your favourite foods a little bit healthier! She's on holiday in Spain at the moment (lucky her!), but I'm sure she'll do a post when she gets back!

My parcel came from Karolina, who is also in London. I kept it really vague, and my only stipulations were that I didn't want tea, coffee or any ready made sauces! But despite my lack of information, she managed to send me a fantastic parcel!

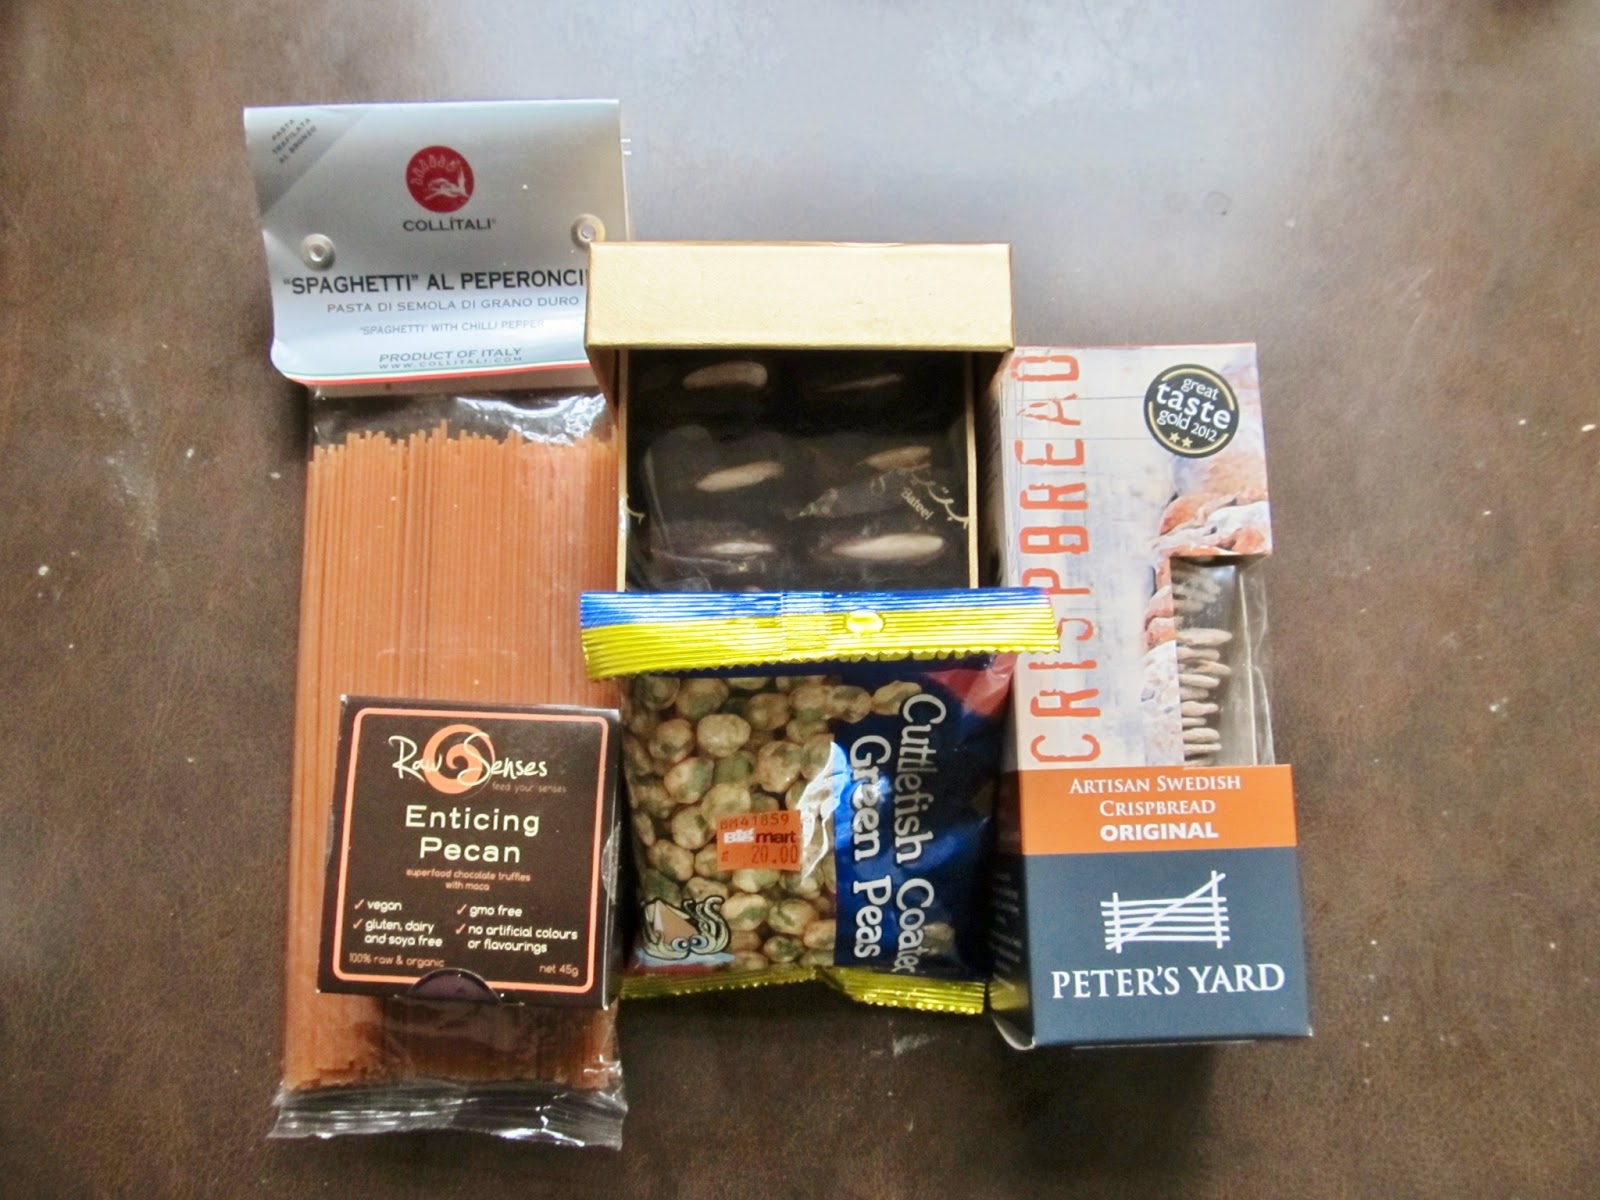
Here it is, in its full arrival glory! 

Inside were (clockwise from top left):
Chilli Spaghetti - I don't often cook pasta, but whenever I do I wonder why I don't more often! Hopefully this will inspire me to cook it more, since I love anything with chilli in it!
Raw Senses Enticing Pecan Truffles - These are from a new brand Karolina is setting up, everything raw, vegan and gluten free. They were gorgeously chocolatey. I hope the company gets going soon so I can have some more!

Almond filled Dates - Dates are one of my absolute favourites at the moment, and these ones are delicious. The almond inside really sets them off beauuuutifully! I had to fight off my Mum, Dad and boyfriend for these!
Peter's Yard Crispbread - I snuck one of these as soon as I opened the parcel. They are tasty enough to munch by themselves, as well as being delicious with cheese and chutney!
Cuttlefish Coated Green Peas - I must admit that I haven't been quite brave enough to try these yet! Karolina said she recently went to Nepal and these were a favourite treat there. They sound very interesting, but I'll be making my boyfriend try them before I dare!!

Thank you Karolina for a fantastic parcel, and Thank you too Carol Anne for continuing to organise such a fab programme.